

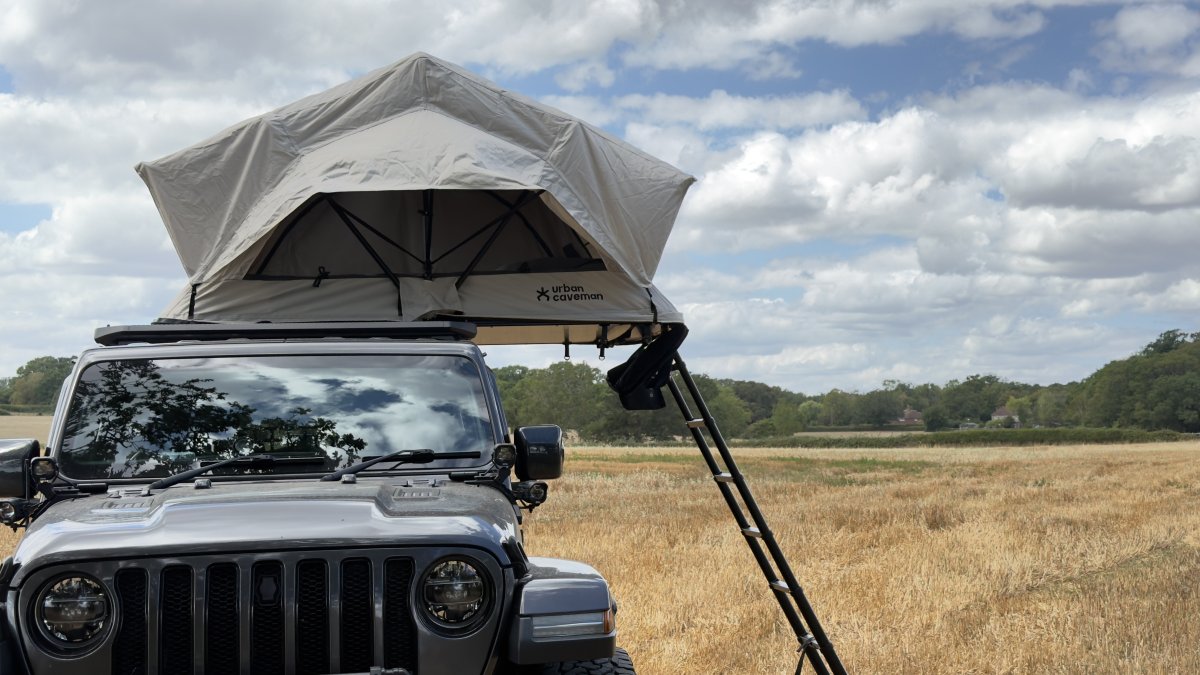
The true luxury of a rooftop expedition lies not in the destination, but in the effortless transition from the driver's seat to a high-end sanctuary. You've likely spent hours weighing hardshell speed against softshell versatility. It's common to feel a flicker of apprehension about the first time you deploy your gear in the wild. Precision matters. Learning how to set up a roof tent shouldn't be a source of stress. Instead, it's a refined ritual that marks the beginning of your evening under the stars.
We'll help you master the art of seamless rooftop camping with our expert guide to choosing, mounting, and deploying your elevated sanctuary. This guide ensures you'll have total confidence in the structural integrity of your setup, allowing for a smooth transition from the motorway to a comfortable mattress. We'll explore the technical nuances of weight distribution and the refined rituals that transform a parked vehicle into a sophisticated, organised camping environment.
Key Takeaways
- Understand the critical difference between static and dynamic roof loads to ensure your vehicle remains stable and secure during every stage of your journey.
- Learn exactly how to set up a roof tent with precision, covering everything from initial mounting to the mechanical grace of final deployment.
- Master site selection by identifying firm ground and using levelling ramps to create a perfectly horizontal sleeping sanctuary in any terrain.
- Optimise your living space by integrating annexes and extensions, whilst using strategic ventilation to maintain a dry, premium interior environment.
- Discover the essential organisation rituals, including the use of boot bags and anti-moisture mats, to elevate your camping experience from basic to bespoke.
The Foundation of Exploration: Mounting Your Roof Tent Safely
A roof tent is more than just a place to sleep. It is a sophisticated piece of overlanding hardware that demands respect during the installation phase. Before you can master how to set up a roof tent at your chosen destination, you must first ensure the foundation is flawless. This process begins with your vehicle's roof. Every car has a limit, and understanding this limit provides the peace of mind required for high-speed motorway travel and restful nights in the wild. It is the difference between a secure sanctuary and a potential safety hazard.
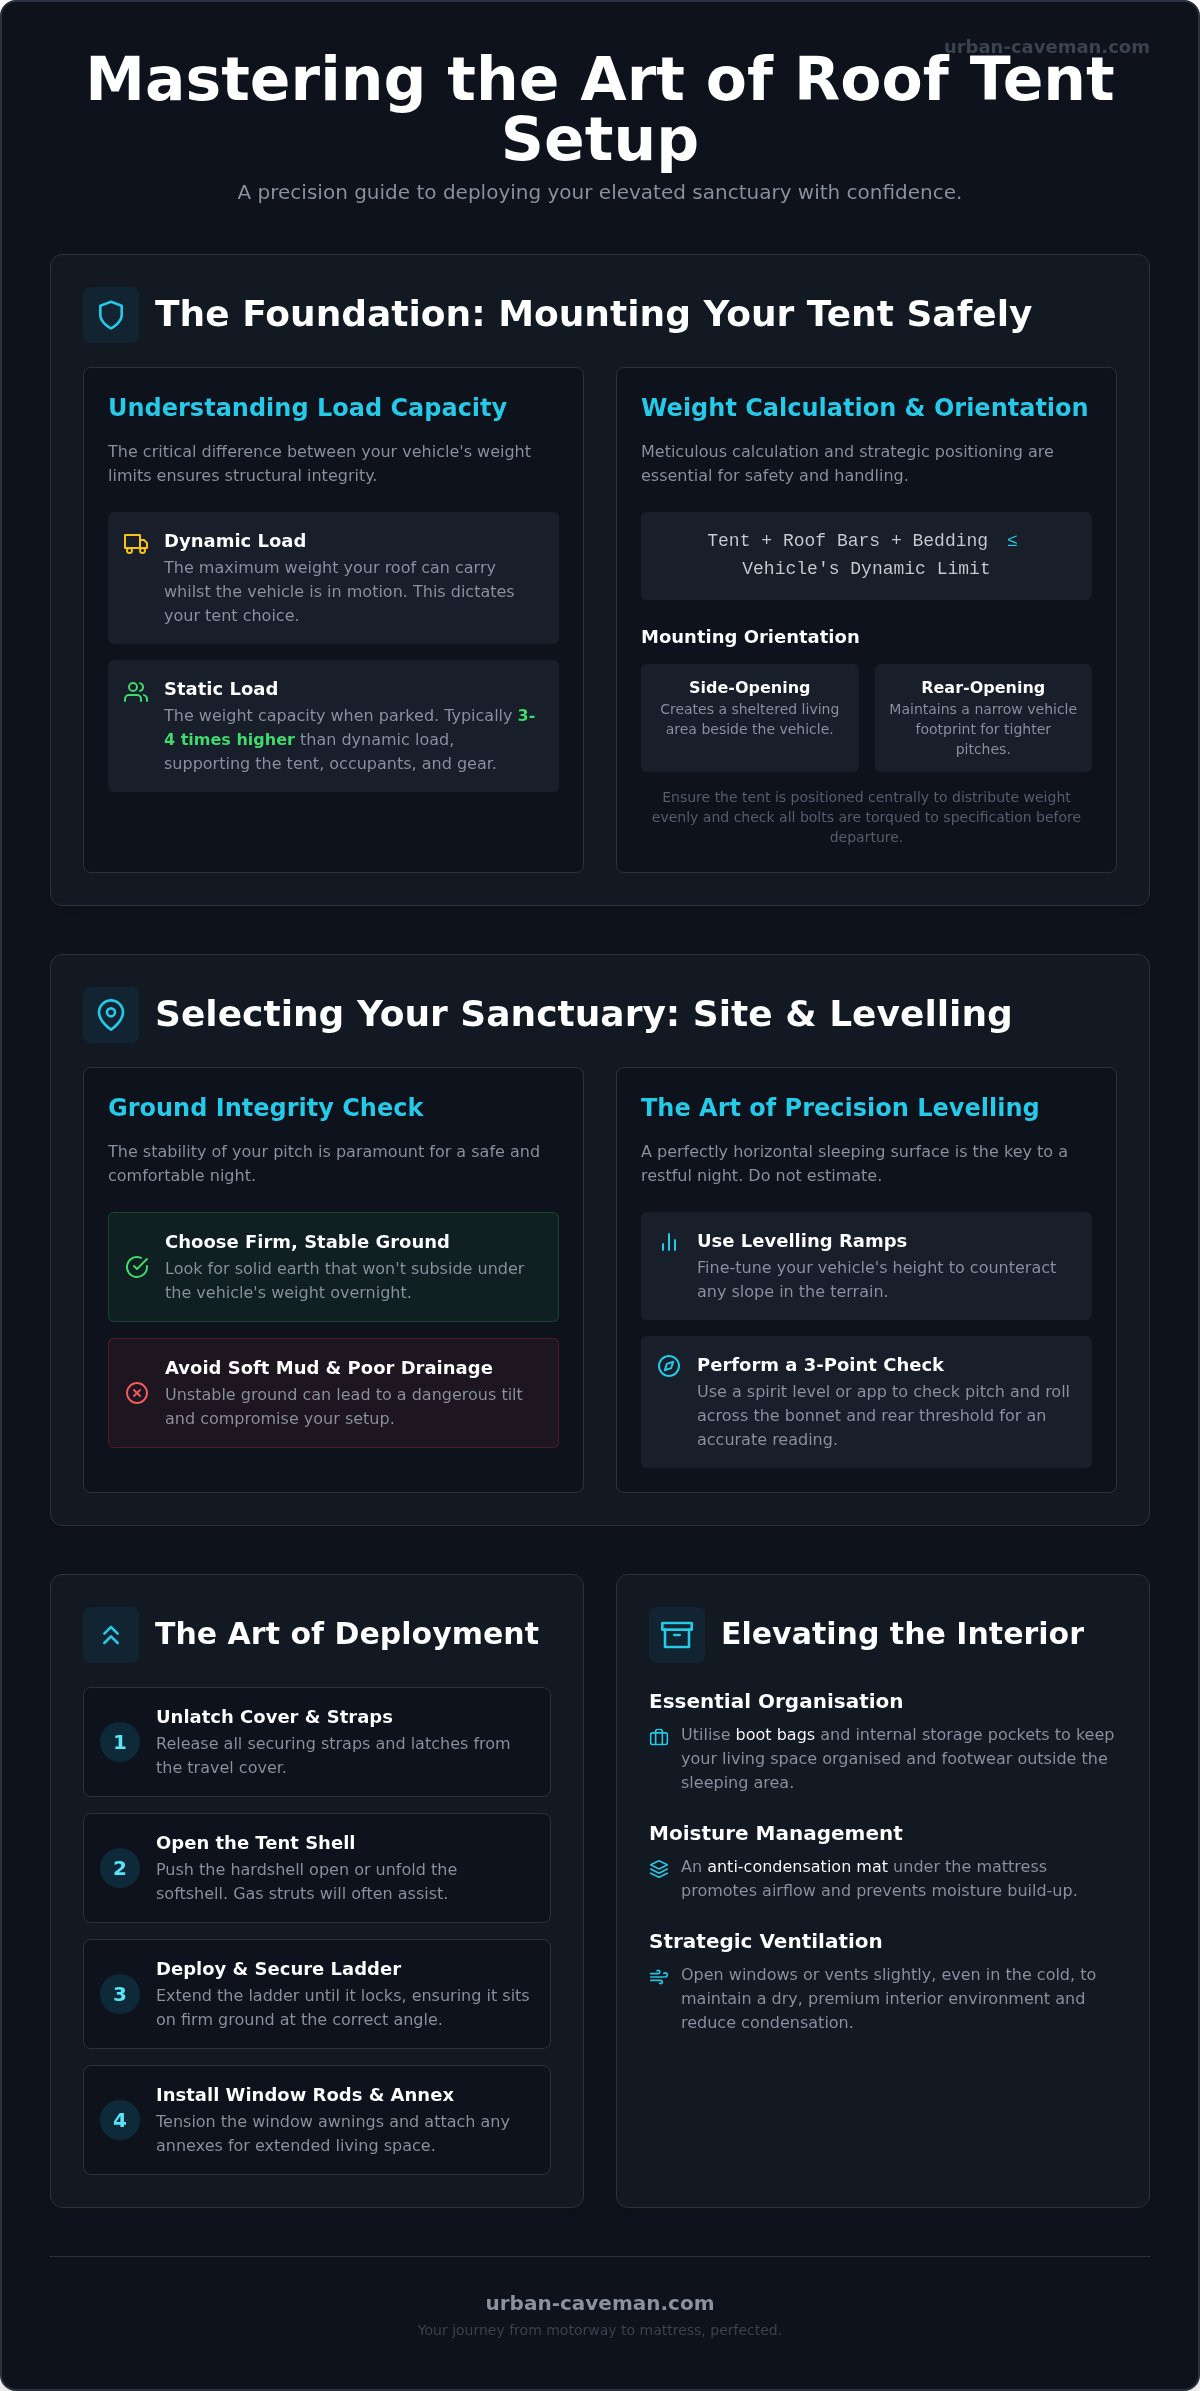
You will encounter two primary figures: dynamic and static load ratings. The dynamic rating is the maximum weight your roof can safely carry whilst the vehicle is in motion. This is the critical figure that dictates which tent your vehicle can support. Once stationary, the static load capacity is typically three to four times higher. This increased capacity allows the roof to support the weight of the tent, the occupants, and all your interior gear without compromising the vehicle's structural integrity.
Calculating Load Capacities for UK Vehicles
Consult your vehicle’s handbook to find the manufacturer's dynamic roof load limit. Precision is paramount here. When calculating your total weight, you must factor in the tent itself, your roof bars, and any interior bedding you plan to store inside whilst driving. If your vehicle is rated for 75kg and your tent weighs 65kg, you have roughly 10kg of headroom for bars and accessories. This meticulous approach ensures your vehicle's centre of gravity remains manageable, keeping handling predictable on winding A-roads or during sudden manoeuvres.
Choosing Your Mounting Orientation
Your choice of orientation influences both aesthetics and utility. Many explorers prefer a side-opening design, which creates a sheltered area beside the vehicle for cooking or relaxing. Others opt for rear-opening setups to keep the vehicle's footprint narrow, which is ideal for tighter pitches. If you are still refining your understanding of what is a roof tent and how different models interact with vehicle frames, remember that orientation is as much about lifestyle as it is about physics. The ladder should never obstruct your doors or the tailgate. In the UK, wind resistance is also a factor. A hardshell tent mounted centrally reduces drag, preserving fuel efficiency during long drives to the Highlands.
Balance is essential for safety. Position the tent centrally over the roof bars to distribute the weight evenly across the vehicle's pillars. This prevents uneven tyre wear and maintains stability. Before departing, perform a final torque check. Use a high-quality wrench to ensure every bracket is tightened to the manufacturer's specification. A quick physical shake test provides that last bit of reassurance. It feels solid because it is solid. You are now ready to move from the tarmac to the trail.
Selecting Your Sanctuary: Site Preparation and Levelling
The journey doesn't end when the engine stops. It evolves. Once you've mastered the technical foundation of mounting, the next phase of how to set up a roof tent is selecting the precise patch of earth it will inhabit. In the UK, where terrain ranges from the loose gravel of the Peak District to the soft, rain-soaked turf of the Highlands, ground integrity is paramount. You're looking for firm, stable ground that won't subside under the static weight of your vehicle and tent. Subsidence overnight can lead to a precarious tilt, undermining the security of your setup.
Precision is the hallmark of the seasoned explorer. A slight incline might seem negligible at dusk, but by 3 AM, it becomes a challenge to your comfort. Gravity is persistent. Sleeping on a slope disrupts blood circulation and can cause you to slide against the tent walls, ruining the sense of an elevated sanctuary. To combat this, carry a pair of high-quality levelling ramps. These allow you to fine-tune your vehicle's height, ensuring your sleeping surface remains perfectly horizontal regardless of the underlying topography.
Safety remains a constant thread throughout this process. Just as adherence to NHTSA safety standards is vital for preventing equipment detachment during transit, your site choice must account for the stability of the vehicle itself. Avoid soft mud or areas prone to drainage issues. A stable vehicle is a safe vehicle.
The Three-Point Level Check
Don't guess. Use a spirit level or a dedicated smartphone app to check the pitch and roll of your vehicle before you engage the handbrake and leave it in gear. A three-point check across the bonnet and the rear threshold provides the most accurate reading. If the bubble isn't centred, use your ramps to elevate the low side. It takes two minutes but guarantees a premium sleep experience that rivals any luxury hotel. It's about control over your environment.
Orientation for Privacy and Views
Think about the morning. Position your vehicle so the ladder entrance faces the most evocative scenery, whether that's a misty valley or a rugged coastline. Use the vehicle body as a strategic windbreak. By positioning the car between the prevailing wind and your lounging area, you create a calm microclimate for evening relaxation. If you're planning a longer stay, ensure you have sufficient clearance for premium accessories like awnings or annexes. These extensions are essential for creating a multi-room environment, but they require a clear, level footprint adjacent to the vehicle. Consider the sun's path; a north-facing entrance keeps the tent cooler in the summer, whilst an east-facing opening welcomes the first light of dawn.
The Art of Deployment: Opening Your Rooftop Retreat
The transformation begins with the release of the heavy-duty travel straps. This is the moment the journey pauses and the retreat begins. Unlike the initial mounting of the hardware, the nightly deployment is a rhythmic exercise in efficiency. Mastering how to set up a roof tent with speed and grace is what defines the seasoned explorer. Whether you're operating a sleek hardshell or a versatile softshell, the objective remains a crisp, taut silhouette that stands firm against the British weather. It is a process of unfolding a sanctuary from a compact travel profile.
Your ladder is the unsung hero of this phase. It is not merely a means of access; it is a structural component that provides vital support to the overhanging section of the tent. Setting the telescopic ladder at a precise 75-degree angle ensures the weight is distributed correctly between the vehicle's roof bars and the ground. This stability is the foundation of a restful night. Without it, the tent floor may flex, compromising both the integrity of the hinges and your own comfort.
Deploying a Hardshell Tent
Hardshell tents are the epitome of effortless utility. Once you unlatch the safety catches, the high-pressure gas struts take the load, lifting the upper shell into position in seconds. It is a display of mechanical grace. During this ascent, ensure the weather-resistant fabric is not pinched in the hinges. Once the shell is fully extended, lock the ladder into position to act as a secondary stabiliser. This setup is particularly effective in the wind-swept moorlands of the UK, where the rigid shell provides an immediate, aerodynamic shield against the elements.
Mastering the Softshell Fold
The softshell deployment rewards a more tactical approach. You will use the ladder as a powerful lever, arcing the tent floor over the side of the vehicle until it sits level. Precision at the base hinges is essential to ensure a seamless floor join, which maintains the thermal barrier of your sleeping area. For those seeking deeper technical comparisons, expert reviews and setup tips offer valuable insights into how different hinge designs affect long-term durability. Once the floor is secure, engage the internal tensioning poles and insert the spring steel window rods. This tensioning is what gives the tent its shape, allowing it to shed rain efficiently whilst providing the ventilation necessary for a premium interior climate.
The final act of deployment is the fine-tuning. Walk around the vehicle to ensure the rainfly is taut and the travel cover is neatly tucked away or secured. A well-deployed tent looks as good as it functions. You have successfully transitioned from a mobile explorer to a stationary resident of the wild, with a sanctuary that is both secure and sophisticated.
Elevating the Interior: Organisation and Comfort Systems
The physical act of deployment is only half the battle. To truly understand how to set up a roof tent, you must look toward the interior environment. A premium rooftop sanctuary isn't just a place to sleep; it's a curated space where organisation meets high-end comfort. Achieving this requires a strategic approach to clutter management and climate control, ensuring the grit of the trail stays firmly outside the threshold. It is about creating a sense of permanence in a mobile setting.
Condensation Management in the UK
British weather presents a unique challenge: humidity. Even in the height of summer, the temperature drop at night can lead to moisture buildup inside the tent. Strategic ventilation is your primary defence. Keep the high-level vents open to encourage constant airflow, even when the air outside feels crisp. Anti-condensation mats are essential for a sophisticated setup. These 3D-mesh layers sit beneath your mattress, creating a vital air gap that prevents moisture from being trapped against the cold floor of the tent. Thermal bridging occurs when the internal metal frame of the tent conducts cold from the exterior directly into the sleeping area, often causing localised condensation points. By managing these temperature differentials, you maintain a dry, premium atmosphere throughout the night.
The Sophisticated Bedding Setup
One of the greatest luxuries of a modern rooftop system is the ability to leave your bedding in place. This significantly streamlines the process of how to set up a roof tent each evening. Whether you prefer high-tog sleeping bags for the Highlands or the familiar weight of a luxury duvet, the key is placement. Fold your bedding toward the centre of the mattress before closing the shell to avoid straining the zips or pinching the fabric. This ritual ensures that when you reach your next camp, your sanctuary is ready the moment the tent is deployed. Utilise roof-mounted cargo nets and integrated storage pockets to keep electronics and personal items off the floor, maintaining a sense of order and protecting sensitive gear from accidental damage.
Boot bags are a non-negotiable accessory for the organised explorer. These external pouches slide into the tent’s keder rail, allowing you to store muddy footwear outside the sleeping area whilst keeping them protected from the rain. Inside, set the mood with warm LED lighting. Dimmable strips integrated into the tent frame provide a soft, sophisticated glow that transforms the space as the sun sets over the horizon. It's these small, considered details that elevate a simple camping trip into a bespoke outdoor experience. To complete your setup, explore our range of premium accessories designed for the discerning explorer. You are not just camping; you are mastering the art of elevated living.
Weathering the Elements: Securing Your Setup for the Night
The final layer of a truly professional setup is security. Whilst the primary structure of a premium tent is inherently robust, the volatile nature of the British climate demands an extra level of preparedness. Once you have navigated how to set up a roof tent and organised the interior, you must anchor your sanctuary to the earth. This is the moment a simple sleeping pod becomes a comprehensive basecamp. It involves extending your living area through awnings and ensuring every line is taut against the evening breeze. Reliability is not an accident; it is the result of methodical preparation.
A secure camp provides the peace of mind needed to enjoy the raw beauty of the wilderness. Whether you are perched on a coastal cliff in Cornwall or tucked into a forest glade in the Cotswolds, your setup must act as a cohesive unit. This means integrating your vehicle, tent, and ground-level accessories into a single, stable environment. By following a strict security protocol, you ensure that even as the weather shifts, your comfort remains uncompromised.
High-Wind Protocols for Rooftop Campers
High-wind scenarios require a tactical response. If gusts begin to challenge the stability of the structure, you must act decisively. On soft British ground, standard pegs often lack the necessary purchase. Use heavy-duty, screw-in pegs to secure the ladder base and guy lines, preventing the tent from oscillating. This tension is vital. It keeps the fabric taut and reduces noise, allowing for a restful night. Close the windward windows completely to prevent the tent from acting like a sail, but keep leeward vents open to maintain airflow. If conditions exceed your equipment's rated limits, the most sophisticated move is to break camp and seek a more sheltered location. Safety always dictates the threshold of adventure.
Integrating Annexes and Extensions
To achieve a truly sophisticated camping environment, consider zipping on a bespoke annex or tent extension. These additions transform your vehicle into a multi-room retreat, providing a private area for changing or a sheltered space for dining. Adjust the height of the extension to match your vehicle’s specific lift, ensuring the fabric sits flush with the ground to exclude draughts. By combining these with vehicle awnings, you create a seamless, weather-shielded corridor between the car door and the tent. This allows you to access gear in the boot without ever stepping into the rain. For those looking to complete their overlanding kit, we offer a range of durable tent extensions designed for the discerning explorer.
The ritual concludes with the morning pack-down. Never pack a wet tent for long periods. If you must depart during a downpour, ensure you deploy the tent again at the first opportunity to dry the fabric thoroughly. This simple act prevents mildew and preserves the premium quality of the craftsmanship. Wipe down the telescopic ladder and check the hinges for debris before securing the travel cover. A clean, dry pack-down ensures your gear is ready for the next leg of your journey, maintaining a cycle of exploration that is as efficient as it is exhilarating.
Master Your Elevated Expedition
Understanding the technical nuances of how to set up a roof tent transforms a standard vehicle into a sophisticated basecamp. From the precise calculation of dynamic roof loads to the refined ritual of levelling your vehicle on rugged terrain, every step ensures your sanctuary remains secure and horizontal. You've mastered the unique challenges of the British climate through strategic ventilation and robust anchoring, allowing you to move beyond mere camping and embrace a lifestyle of effortless utility. These rituals don't just provide safety; they create the peace of mind required to fully immerse yourself in the raw beauty of the landscape.
Ready to begin your journey? Explore our premium range of roof tents and extensions at Urban Caveman. Our hardware is expertly curated for the British explorer, featuring durable designs that provide seamless utility in the wild. With national UK delivery on all overlanding gear, your next elevated sanctuary is ready for the trail. The wilderness is waiting. Step out with confidence and rediscover the horizon from a new perspective.
Frequently Asked Questions
Can I set up a roof tent on my own, or do I need a partner?
Most modern roof tents are designed for solo deployment once they are safely mounted on the vehicle. Hardshell models with gas struts are particularly effortless. They require only the release of latches to open automatically. Softshell models involve more physical movement to arc the floor into position but remain manageable for a single explorer. Whilst the initial installation onto the roof bars is a two-person job, the nightly ritual is a solo endeavour.
How long does it typically take to set up a roof tent at a campsite?
Deployment times vary between sixty seconds and five minutes depending on the specific model. Hardshell tents are the pinnacle of speed. They often reach full height in under a minute. Softshell designs require a few extra minutes to unfold the floor and secure the rainfly poles. Mastering how to set up a roof tent with efficiency comes with practice, allowing you to transition from driving to relaxing almost instantly.
Is it safe to leave my roof tent on the car all year round in the UK?
You can safely leave your tent mounted year-round, provided you follow a basic maintenance routine. British winters bring road salt and grit which can affect moving parts and zips if left uncleaned. Whilst the durable outer shells are designed for the elements, many owners choose to remove the tent during the deepest winter months to preserve fuel efficiency and protect the fabric from prolonged dampness. Regular inspections of the mounting hardware are essential.
What happens if I have to pack the tent away whilst it is still wet?
Packing a wet tent is perfectly acceptable for short durations, such as the drive to your next destination. However, you must deploy the tent again within twenty-four to forty-eight hours to allow the fabric to dry completely. Leaving a damp tent closed for longer periods risks the growth of mildew and can damage the internal mattress. Always ensure the interior is bone-dry before long-term storage in your garage or shed.
Do I need a specific type of roof rack for a hardshell tent?
A high-quality set of heavy-duty crossbars or a dedicated platform rack is necessary to support the weight of a hardshell tent. Standard factory-fitted bars often lack the required dynamic load rating for these heavier units. Ensure your rack system is compatible with the tent's mounting tracks and can handle the static weight of occupants. Investing in professional-grade hardware provides the structural integrity required for high-speed travel and secure nights.
Can I fit a roof tent to a small hatchback or only 4x4s?
Roof tents are compatible with many small hatchbacks, provided the vehicle's dynamic roof load limit exceeds the weight of the tent and bars. Many modern cars have a rating of 50kg to 75kg, which is sufficient for lightweight hardshell or softshell models. You don't need a heavy-duty 4x4 for rooftop exploration. Always verify your specific car's limit in the manufacturer's handbook before selecting your gear to ensure a safe, balanced setup.
How do I stop the tent from shaking in high winds at night?
Minimising movement in high winds starts with positioning your vehicle to act as a windbreak. Point the narrowest or most aerodynamic part of the tent into the wind to reduce drag. Ensure your guy lines are taut and anchored with heavy-duty pegs to provide additional lateral stability. When you know how to set up a roof tent for adverse weather, you can sleep soundly whilst the fabric remains quiet and secure.
Should I remove the internal bedding before folding the tent?
Most hardshell and many softshell tents are designed to close with a reasonable amount of bedding left inside. This is a primary benefit of the system, allowing for a rapid departure in the morning. You should lay sleeping bags or duvets flat across the mattress rather than bunching them up. If the shell feels difficult to latch, remove a pillow or a bulky blanket to avoid putting undue stress on the hinges.
Share:
Small Car Rooftop Tent Compatibility Explained
Rooftop Tent Winter Camping Tips That Work