

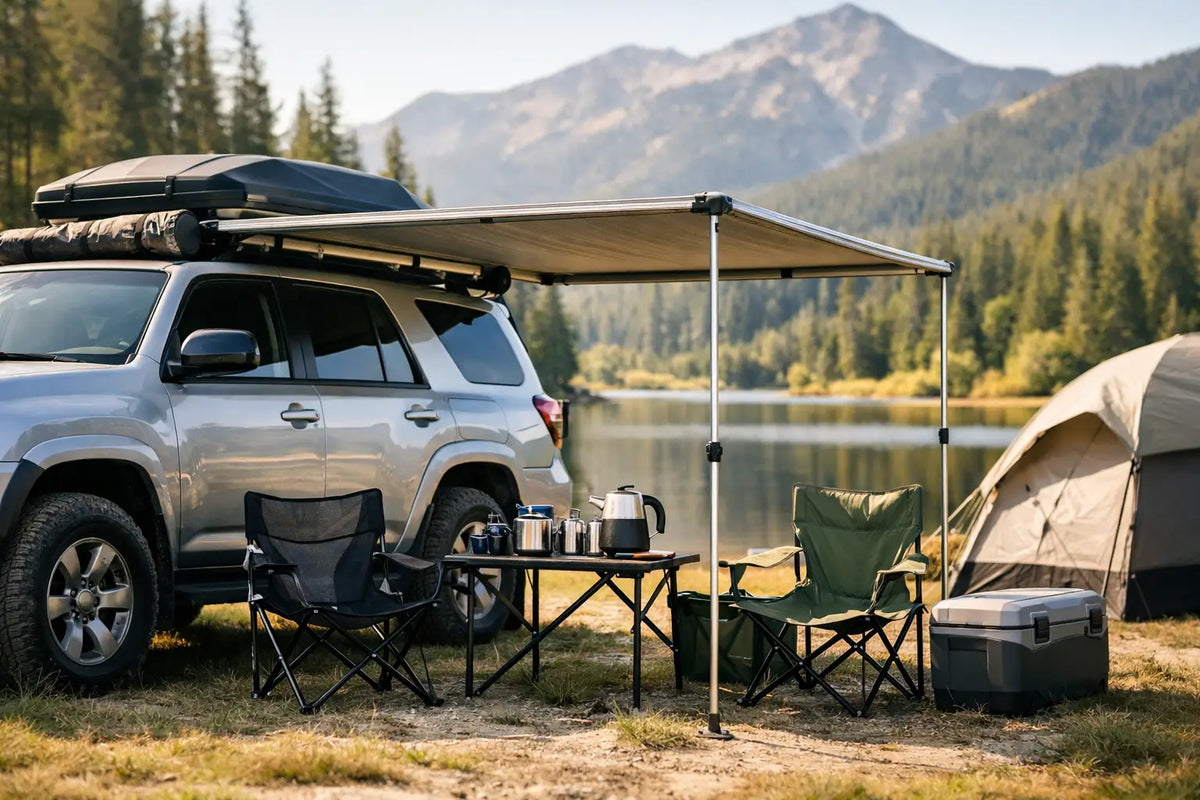
The difference between arriving at a great pitch and actually enjoying it often comes down to the first five minutes. The way you mount car awning hardware determines whether you have dependable shelter at the side of your vehicle or a frustrating setup that rattles, sags or blocks the boot. Get the foundations right and your car becomes a more comfortable base for weekends away, coastal stops and longer routes beyond the city.
Why the mounting point matters
An awning is simple in principle: it creates a dry, shaded outdoor room exactly where you need it. But it is also a long, loaded item fixed to a moving vehicle. It must cope with motorway speeds, uneven lanes, wind pressure and repeated opening and closing without working loose.
That makes the mounting system more than a set of brackets. It is the connection between your roof rack, your vehicle and the shelter you rely on when the weather turns. A quality awning can only perform as well as the bars and fixings beneath it.
The goal is not to put the awning as high or as far out as possible. It is to create a secure, usable position that clears doors, opens cleanly and keeps weight properly supported. Comfort in the wild starts with confidence in the details.
Before you mount a car awning
Check the full load path
Start with the vehicle manufacturer's roof-load limit, then check the rating for your roof rails, crossbars or roof rack. These figures are not interchangeable. The lowest rated component sets the real limit.
An awning's stated weight is only one part of the equation. Include the brackets, any rooftop tent, recovery boards and other equipment already on the rack. Also distinguish between dynamic load, which applies while driving, and static load when parked. A rack may hold more at camp than it is permitted to carry on the road.
If anything is unclear, confirm it before fitting. Guesswork is not a substitute for a rated mounting system.
Choose the side and height with real use in mind
Most drivers fit an awning to the passenger side, keeping the open shelter away from passing traffic when pulling over in the UK. That is sensible for roadside stops, though campsite layout and the location of your vehicle doors may make the driver's side a better choice.
Height matters too. Mount the awning high enough for comfortable headroom, but not so high that the support legs become awkward to reach or extension walls sit too far above the ground. On taller SUVs, 4x4s and vans, a small folding step can make setup far easier.
Open the boot, tailgate and all relevant doors before tightening anything down. Check that they clear both the awning case and its brackets. A tailgate that only opens halfway quickly turns a well-planned camp kitchen into a compromise.
Use brackets designed for the job
Awning brackets should match both the awning's mounting channel and the profile of your roof bars or rack. Avoid improvised fixings, thin universal plates that flex, or hardware that leaves the awning supported at only one narrow point.
Use corrosion-resistant bolts, washers and locking nuts where supplied, and follow the specified torque settings. Do not overtighten to the point that you crush an aluminium roof bar or distort the awning casing. Secure is the target, not brute force.
How to mount a car awning securely
Set aside enough time to fit it calmly. Awning cases are long and can be cumbersome, so a second person makes the job safer and far more accurate.
1. Fit and space the brackets first. Position the brackets on the roof rack as far apart as the awning's mounting rails allow. Wider spacing reduces movement and distributes the load more evenly. Keep them over strong sections of the rack rather than at an unsupported outer edge.
2. Offer up the awning before final tightening. With help, lift the closed awning case into position and loosely attach it to the brackets. Stand back and check its alignment with the vehicle. It should run parallel to the roof line, without looking nose-up, tail-down or twisted.
3. Set the fore-and-aft position. Centre the case where possible, while allowing for tailgate clearance and easy access to the pull strap or zip. A slight rearward position can provide more practical coverage around a boot-based kitchen, but do not let the case overhang so far that it becomes vulnerable to knocks.
4. Tighten in stages. Alternate between fixings so the brackets pull down evenly. Once tightened to the recommended setting, check that the case cannot slide along the bars or rock at either end. Refit any caps, covers or security hardware supplied with the system.
5. Open it before your first trip. Deploy the awning on level ground. Confirm that the legs reach comfortably, the fabric clears doors and the support arms lock as intended. Pack it away again slowly, making sure the material is dry where possible and fully contained before closing the cover.
After the first drive, inspect every fixing. New components can settle slightly under vibration. Check again after a few journeys, then make it part of your pre-trip routine.
Position your awning for the weather, not the photo
A broad rectangle of shade looks good at a sunny campsite. British weather asks more of it. When rain is likely, set one outer corner lower than the other so water runs off rather than pooling in the fabric. If your awning allows adjustable legs, this takes seconds and protects the material from unnecessary strain.
Wind is the bigger consideration. Use the supplied guy lines and pegs whenever conditions are breezy, even if the awning feels stable at first. Peg the lines at a visible angle and consider bright markers or small lights around them after dark. Nobody wants their evening to end with a trip over a guy line.
In strong or gusting winds, reduce the exposure or pack the awning away. An awning is a brilliant shelter, not a permanent structure. Leaving it unattended in changeable weather is an easy way to damage fabric, arms, brackets and roof bars in one go.
The mistakes that make a good setup feel clumsy
The most common issue is fitting an awning without considering the rest of the camp. If your roof tent ladder lands under the awning arm, or your rear door clashes with a support leg, each stop becomes a sequence of workarounds. Open everything once at home and test the complete layout before heading out.
Another is assuming a closed awning needs no attention. Road grime, salt and low branches take their toll. Wipe down the casing, rinse off mud and inspect the cover zip, seams and mounting bolts after rough or winter trips. If you pack the fabric wet, reopen it to dry as soon as you can. Mildew is an avoidable enemy of premium kit.
Finally, do not treat every roof bar as equal. Factory crossbars may be suitable for a light awning, while a heavier 270-degree unit or a combined tent-and-awning system may call for a purpose-built rack. The right answer depends on your vehicle, load rating and the way you travel.
Build a better stop, wherever you park
Once mounted properly, an awning changes the rhythm of a trip. Coffee stays dry. Muddy boots stay outside. Lunch does not depend on finding the one picnic table with shade. Add an extension or side wall when you want more privacy and weather protection, but keep the basic setup quick enough that you will use it for a one-night escape as readily as a week off-grid.
Urban Caveman kit is built around that idea: less campsite admin, more time outside. Fit your awning with care, practise the setup once, and the next open road will feel a little more like home.
Share:
Are Rooftop Tents Safe? What Matters Most
Overlanding Tents That Make Every Stop Better